Removable floorboards look good and keep the interior both cleaner and drier. The rowing version can use wider boards but the sailing setup requires narrow boards to fit around the daggerboard case. Footbraces are a must for more efficient rowing. Ideally they should support the balls of the feet but this small moveable one is less obtrusive and does the job.
The Reinforcements
Instead of installing a traditional two-piece breasthook at the bow we went with one used on a St Ayles skiff, another Iain Oughtred design. This single-piece breasthook is fastened under the gunwales making it much easier to fit. The aft bottom edge is chamfered to give it a lighter appearance and a hole is drilled in the centre for attaching the painter.
At the stern, we replaced the transom cleat with a variation of the forward breasthook. Fitted the same way, under the gunwales, but this time the aft edge is bevelled to meet the transom The foward bottom edge is also chamfered. Two holes are drilled to attach a lifting rope.
Seating Arrangements
The position of the thwarts in each boat is different. My boat will primarily be rowed as a fixed seat double. A secondary setup will include the addition of a Row Wing sliding seat rigger. I have changed the layout of the seating from the drawings by moving the thwarts to stations #3 and #5. This will improve the balance of the boat for both my rowing setups. Don’s boat is being rigged for sailing so the thwarts are positioned as the designer drew them for the sailing version.
We installed the thwarts by first cutting the ends to match the bevels where they met the planking. Temporary screws driven from the outside of the hull held the thwarts in position while we fitted the seat cleats. The cleats were then glued in place, also using temporary screws through the planking. The final step was to scribe and trim the ends leaving an 1/8” gap before screwing them into the cleats.
Primetime
After sanding, filling, sanding and more sanding the hull is ready to be painted. The transom and the top edge of the sheerstrake, where the outer gunwale will be attached, are masked off. Two coats of primer are applied with roller and brush, white for the sheerstrake and dark grey for the rest.
One last job before turning the boat over is to attach the outer stem. The width of the forward face and the aft side of the stem, where it meets the planking, are scribed. The stem can then be tapered on the bench before being glued, screwed and plugged.
The 5-Minute Clamp
One advantage of epoxy is that it doesn’t require strong clamping pressure. On the down side, the parts being glued, can slip around if the pressure is not even. Fastening the skeg is one of those situations where traditional clamps cannot be used. Using screws driven from the inside is one answer but it is difficult with the boat upside down and the molds in the way.
A simple method is to apply the regular epoxy adhesive to the joint but leaving bare spots near each end for dabs of 5-minute epoxy. Hold the skeg in place for 5 minutes by hand until the epoxy hardens. Once the boat is turned over screws can then be added.
The Coverup
Once the planks were glued up, they were cut to shape using the full-size patterns. We used three different methods to attach the planks. The garboards were screwed into the bottom panel using temporary screws, pre-drilled and driven in at an angle. With the middle planks we were able to use plywood clamps and wedges. This method is excellent for glued plywood lapstrake planking but unfortunately was not possible for fastenening the garboards due to their width. Nor was this method suitable for the sheerstrakes because the sheerclamp was in the way. To attach them, we used temporary screws along the sheer clamp. At the landing, a batten was fastened with screws and spacer blocks to the frames, stem and transom. Wedges were then slipped in between the batten and the plank to apply pressure.
Doggone Scarfs
Once the full size plank patterns are made, the marine ply is cut into strips, 16” for garboards and 8” for the other two planks. The patterns are layed over top of the strips to determine the angles for the dog-leg scarfs. A power plane or jack plane is used to take off the bulk of the wood, followed by a sharp low-angle block plane. Planing the scarfs to a feather edge, without tearing out, is especially difficult with the paper-thin outer veneers on today’s marine plywood.
Small finishing nails are driven through the joints on each side to keep the pieces aligned when clamping. The garboards and middle planks required only one joint each but the sheerstrakes needed two scarfs each to make up the required length.
Channel blocks, the width of the scarf, are clamped top and bottom giving even pressure on both sides of the joint and they also allow the alignment nails to stay in place while clamping.
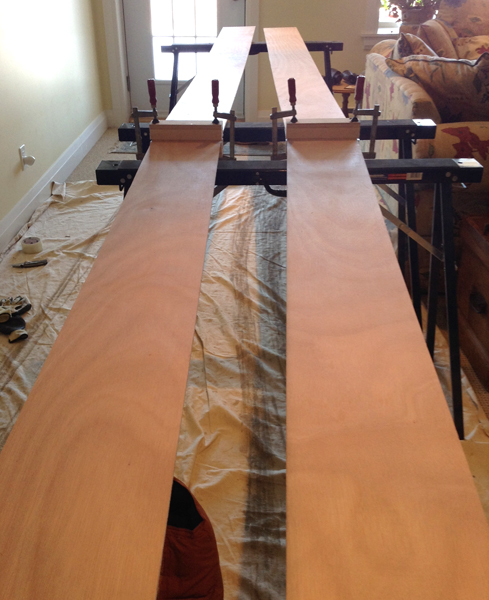
Bottoms Up
The bottom panel is the easiest of the planking to install. After fairing, the 2′ x 13′ scarfed panel is laid on top of the setup and the outer edges of the frames, molds, stem and transom are marked. Using a batten, line up the marks, scribe the line and cut out with a jig saw. A few temporary screws hold it in place while the epoxy sets. Next, the edges are planed where the garboard planks will be fastened.
Clamping the Clamp
The last thing to be done before the planking starts is to fit the sheerclamps (inner gunnels). Usually they are attached after the hull is turned over, however, with dories they are notched into the frames and fastened to the stem and transom. Holding them in place while the epoxy sets is a bit of a challenge especially at the ends where they have a tendency to twist. At the bow we used temporary screws with a “V” clamping block and at the transom we clamped a piece of wood to the outside of the sheerclamp which was then screwed into the side of the transom.
On the Level
Two tools that don’t see a lot of use in boatbuilding are a carpenter’s level and square. The one exception is when setting up the building frame and attaching the molds, frames, stem and transom. Ensuring the 16′ building frame rails are straight is a challenge using solid wood so we cut 5/8″ plywood into 3-3/4″ strips and laminated them together. The frame is 30″ wide and 21″ high, making it a comfortable to work on the boat but also gave us enough room to crawl under if necessary.